[ad_1]
We’ve acquired movies and step-by-step directions for 3 of the preferred newbie friendship bracelet patterns. Studying to make a friendship bracelets is a ceremony of passage for everybody and whereas they could look advanced, they’re truly fairly straightforward to make.
Whether or not you’re making these as finest pal bracelets, a summer season camp craft, or simply to chill out, these friendship bracelets are straightforward and enjoyable for adults and youngsters alike.
Associated: Make Your Personal Macrame Bracelet, Easy Macrame Desk Runner DIY, Macrame Room Divider DIY, Macrame Purse Tutorial
What do Friendship Bracelets Symbolize?
The giving of 1 bracelet to a different is supposed to represent friendship and a want is made because the bracelet is tied on (the want is meant to come back true when the bracelet is so worn it falls off). It’s believed that the origins of friendship bracelets return to Indigenous Peoples in Central and South America.
What’s the Finest Thread to Use for Friendship Bracelets?
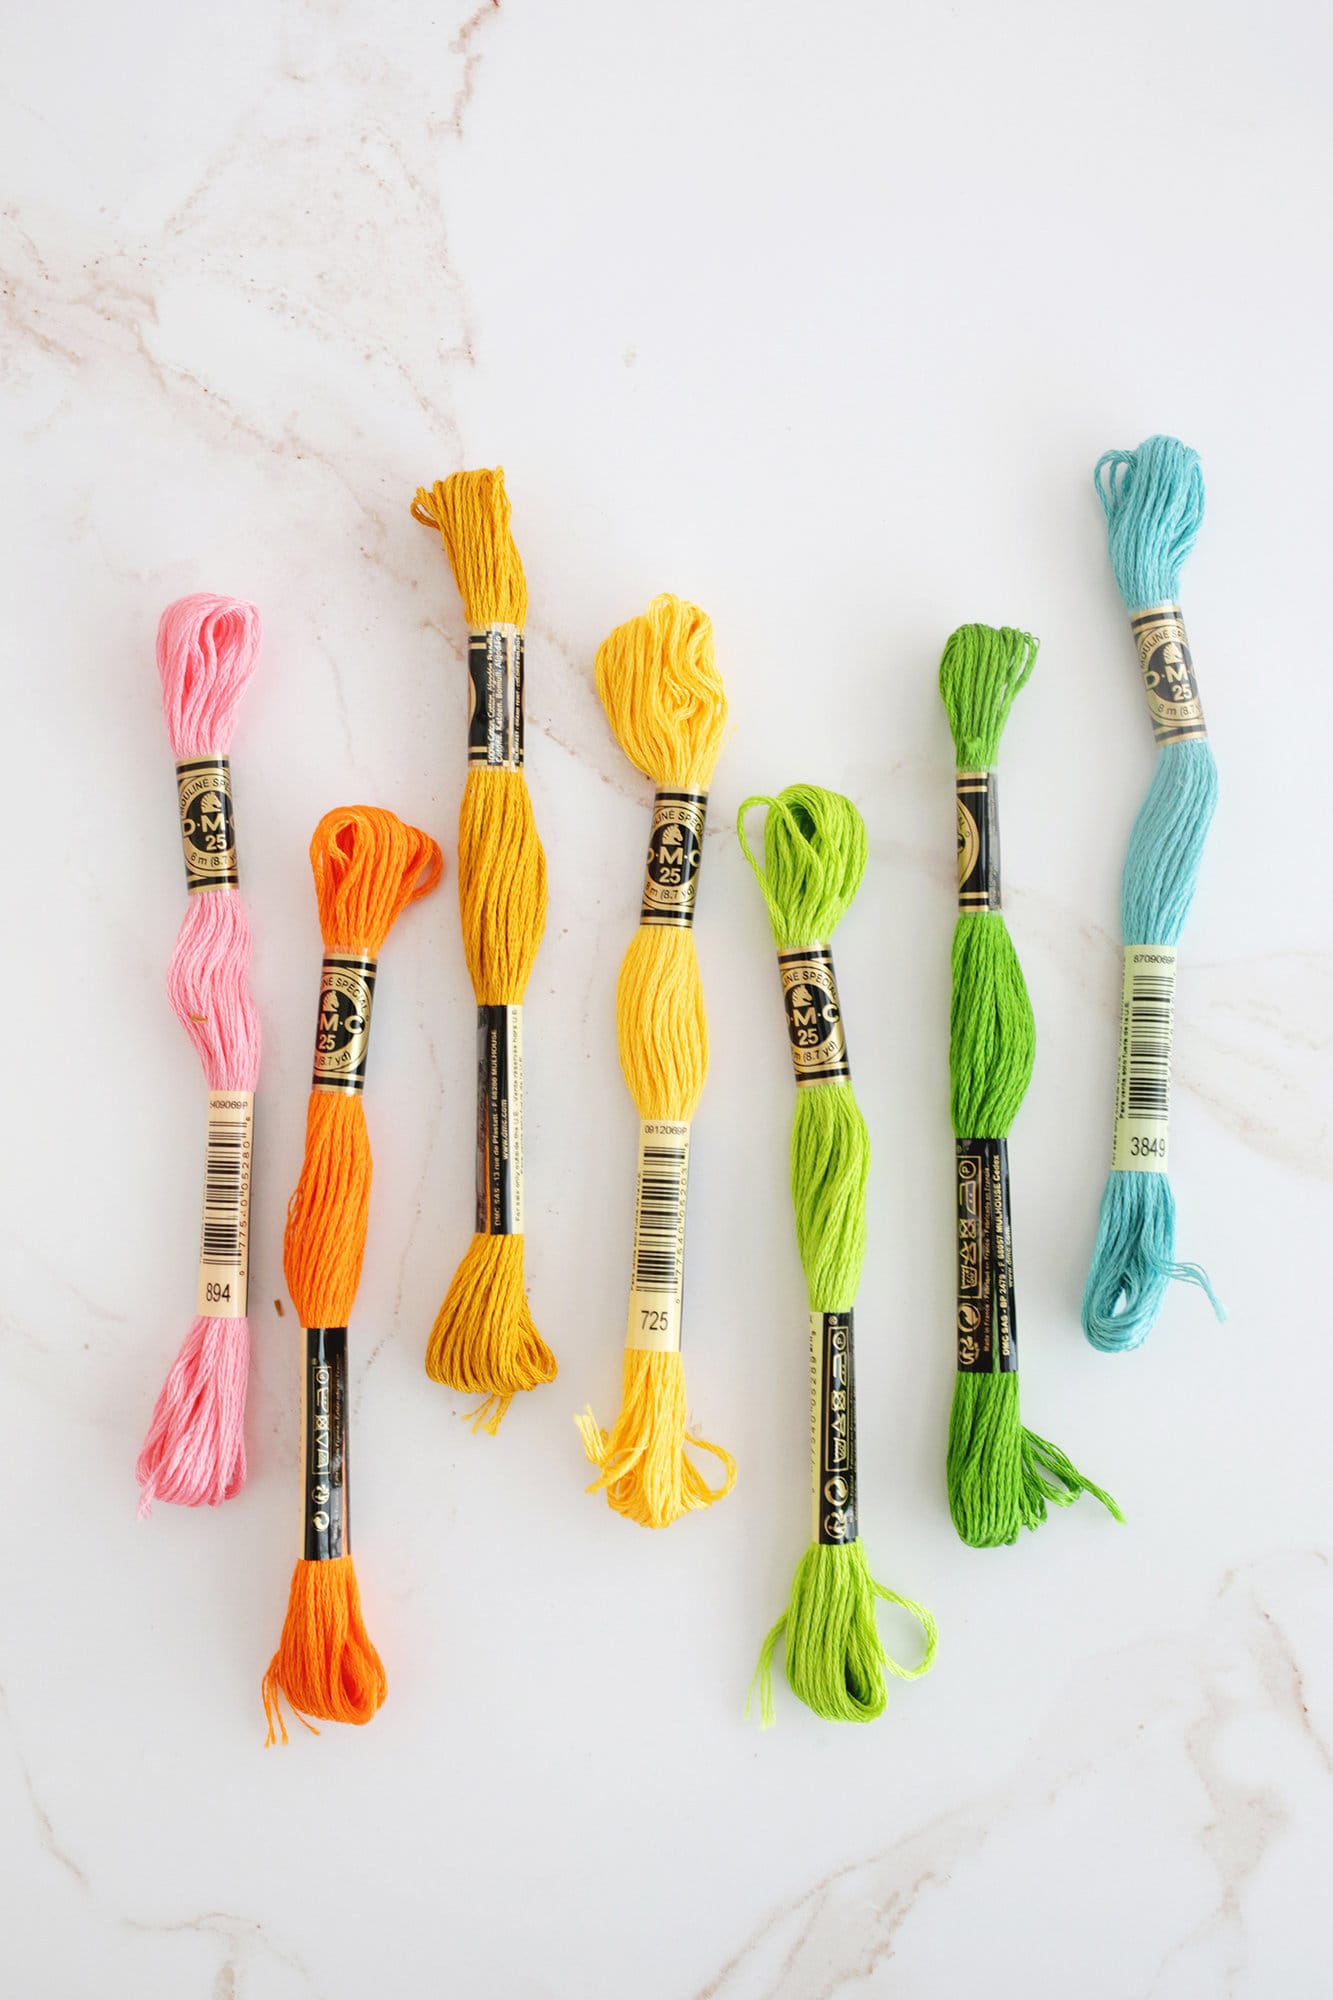
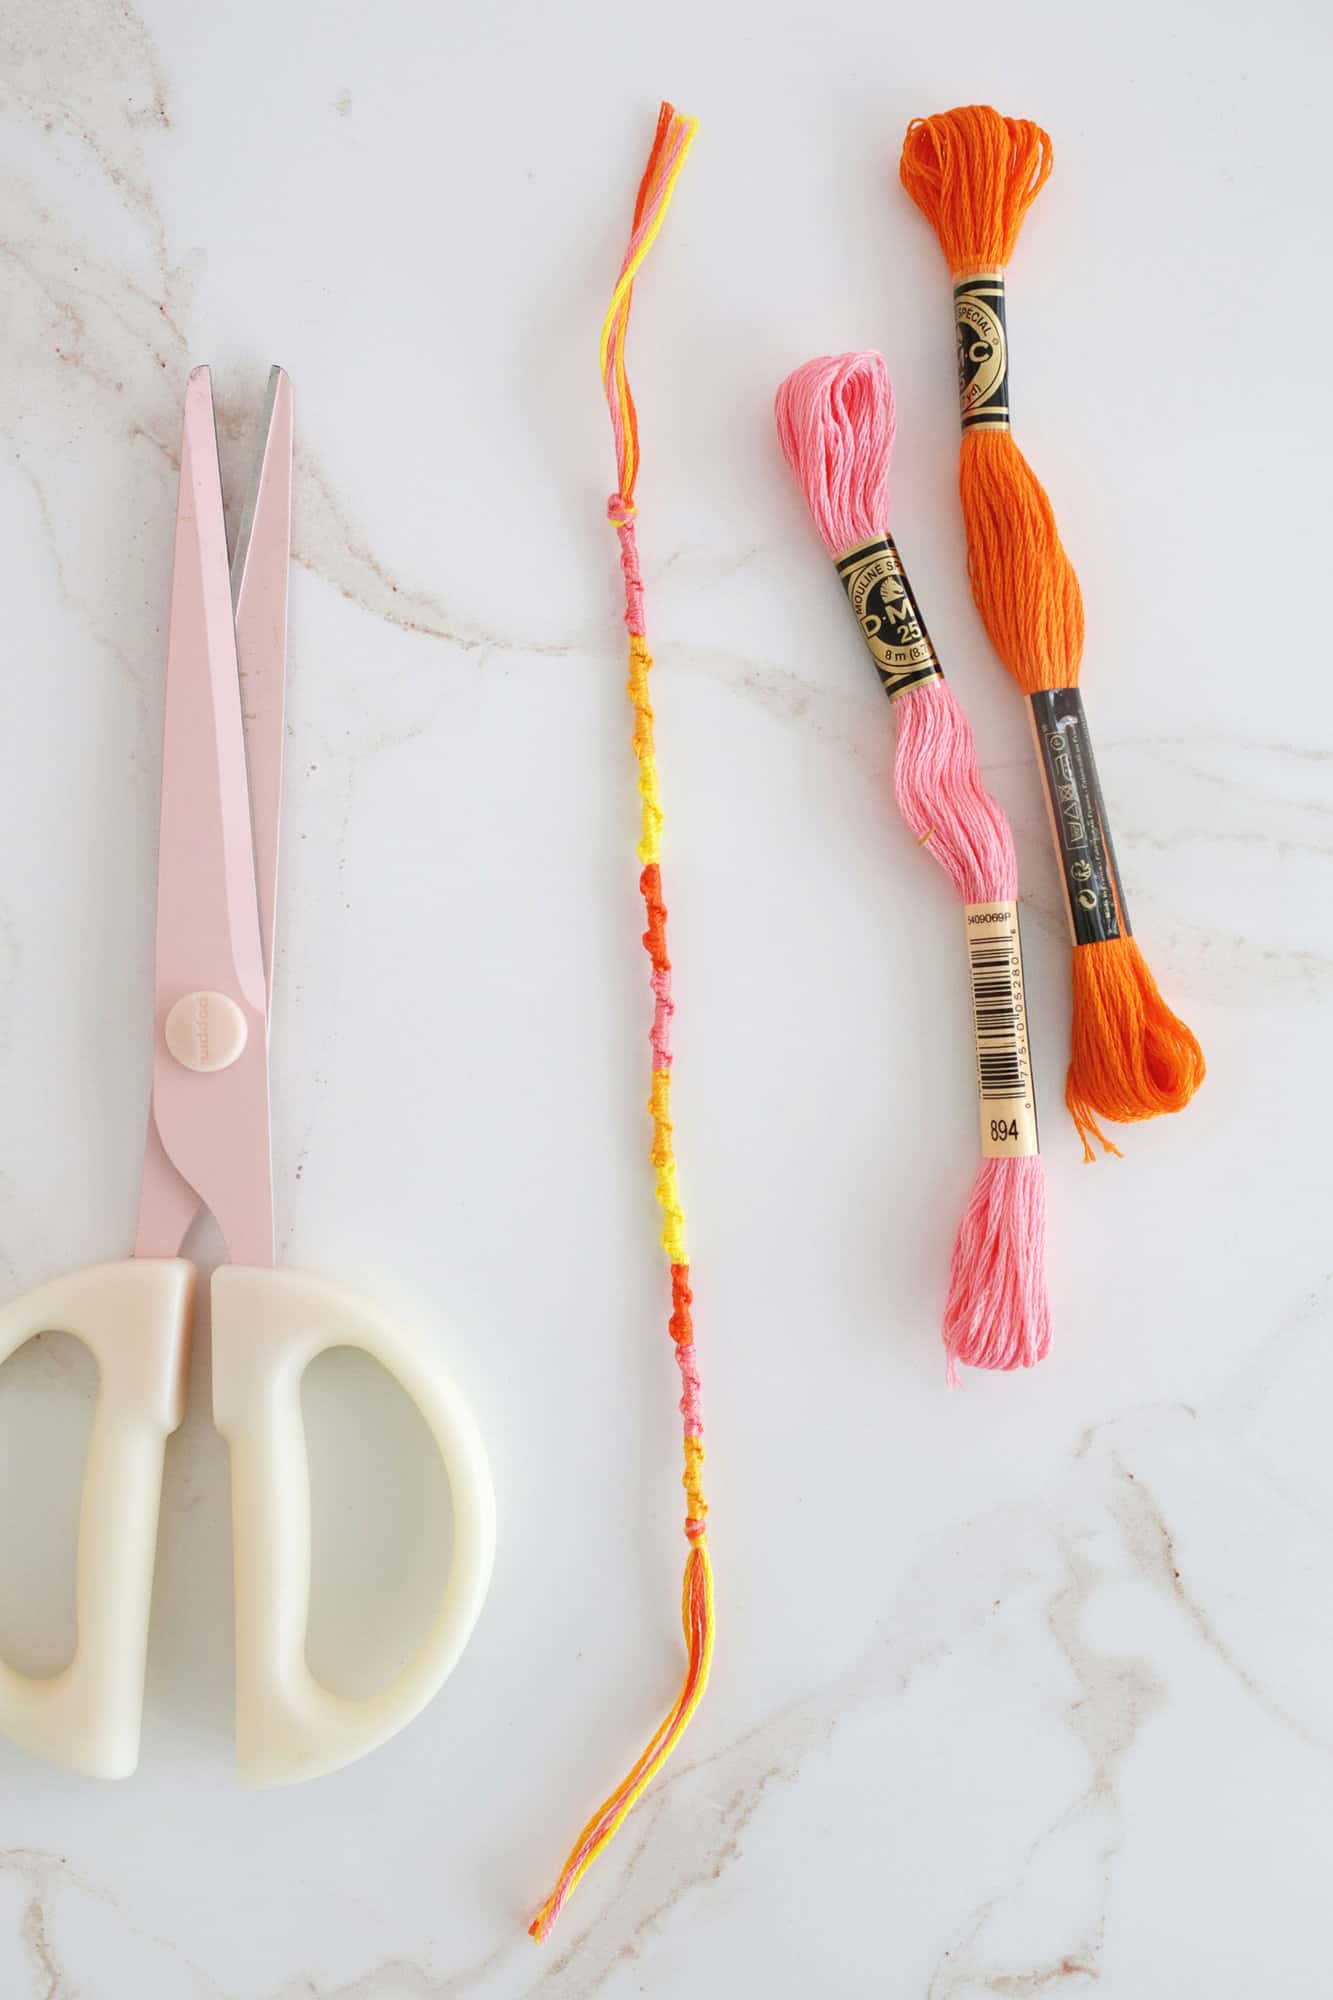
The very best thread to make use of for friendship bracelets is embroidery floss thread as it’s skinny however robust, straightforward to work with, and is available in numerous totally different shade combos.
The 4 Fundamental Friendship Bracelet Knots
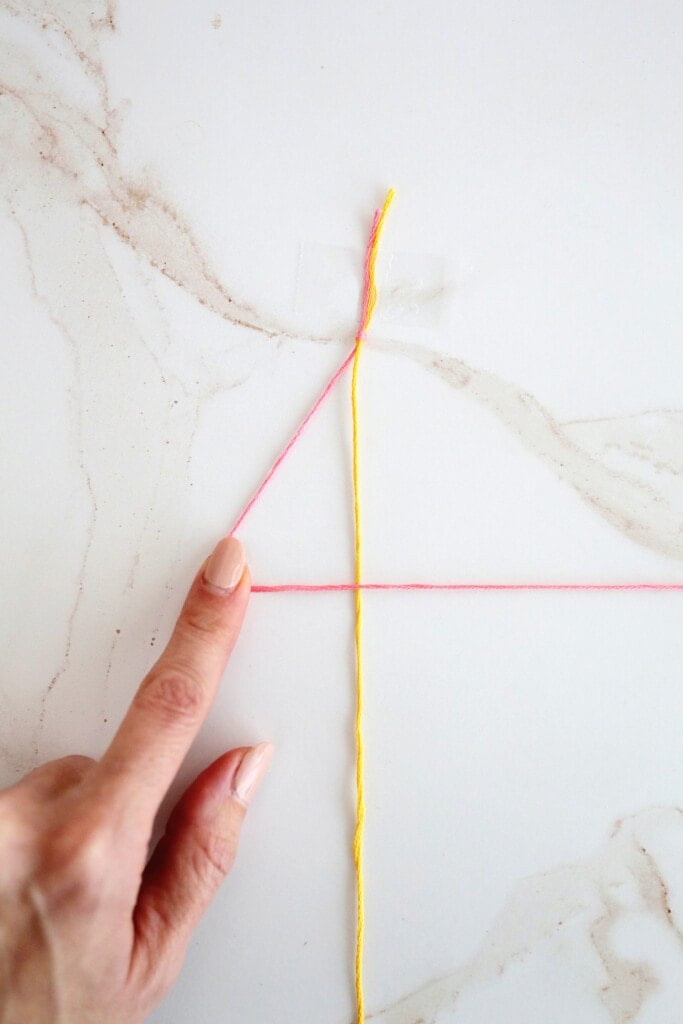
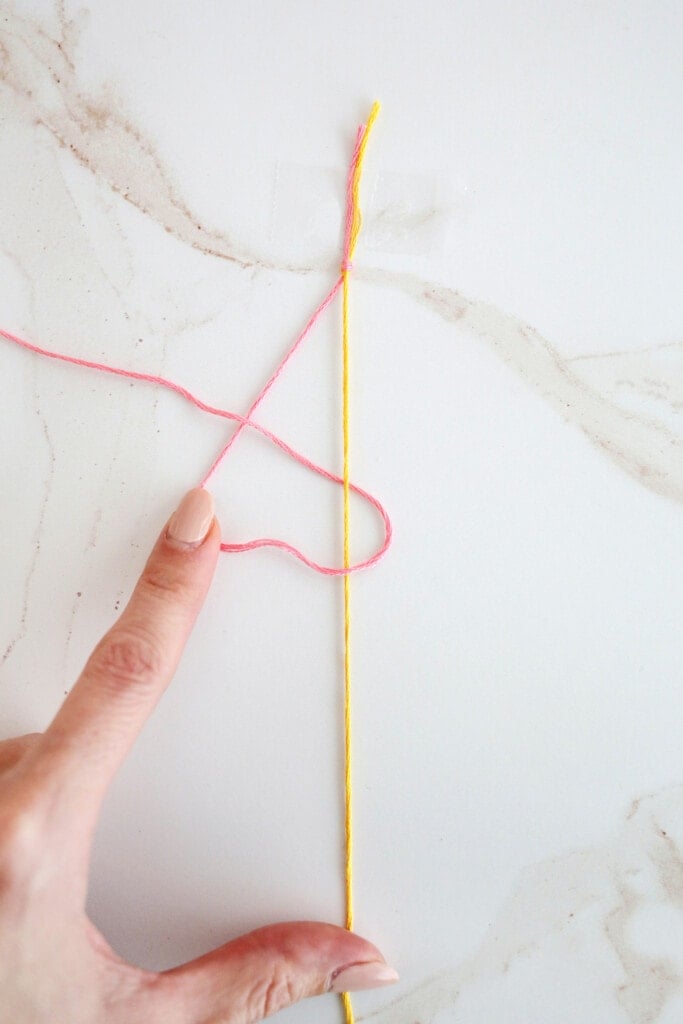
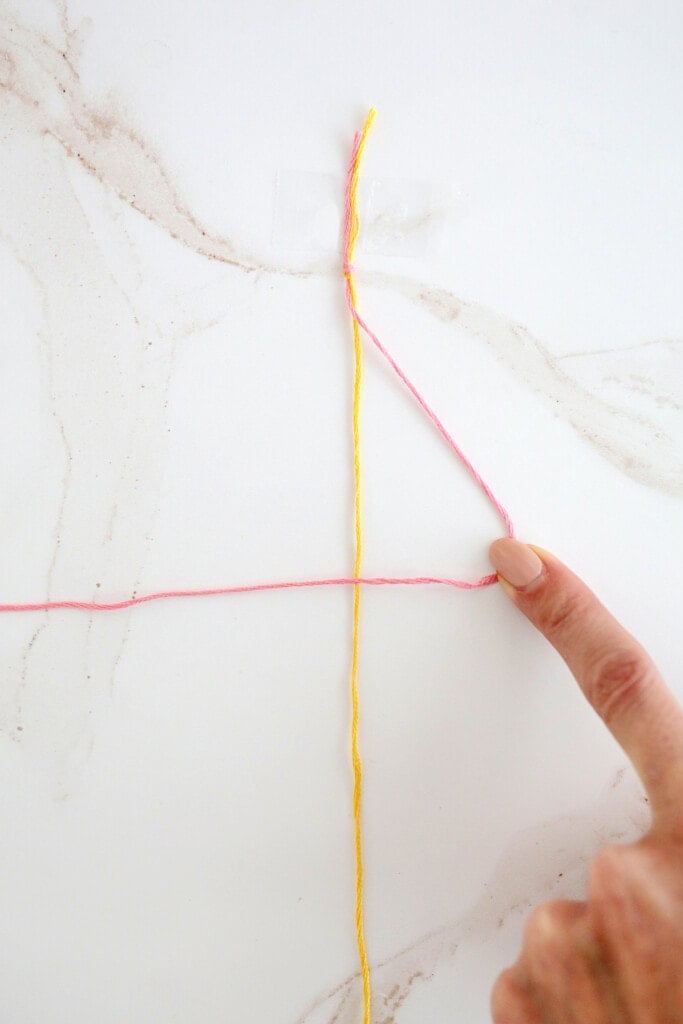
The knots in friendship bracelets are literally two knots stacked on prime of one another. Every single knot known as a “hitch” and so two “hitches” stacked collectively equal one knot. Whether or not you might be tying them forwards or backwards makes the totally different combos under … see the video to look at them in motion!
- Ahead knot: ahead hitch + ahead hitch
- Backward knot: backward hitch + backward hitch
- Ahead-Backward knot: ahead hitch + backward hitch
- Backward-Ahead knot: backward hitch + ahead hitch
Provides
The right way to Make a Spiral Staircase Friendship Bracelet
This bracelet (additionally referred to as a Chinese language Staircase) is among the best friendship bracelets to make, so it’s nice for teenagers and novices! You should use as much as 6-8 totally different colours (this bracelet is proven with 4), however simply be aware that the bracelet will probably be thicker the extra colours you employ.
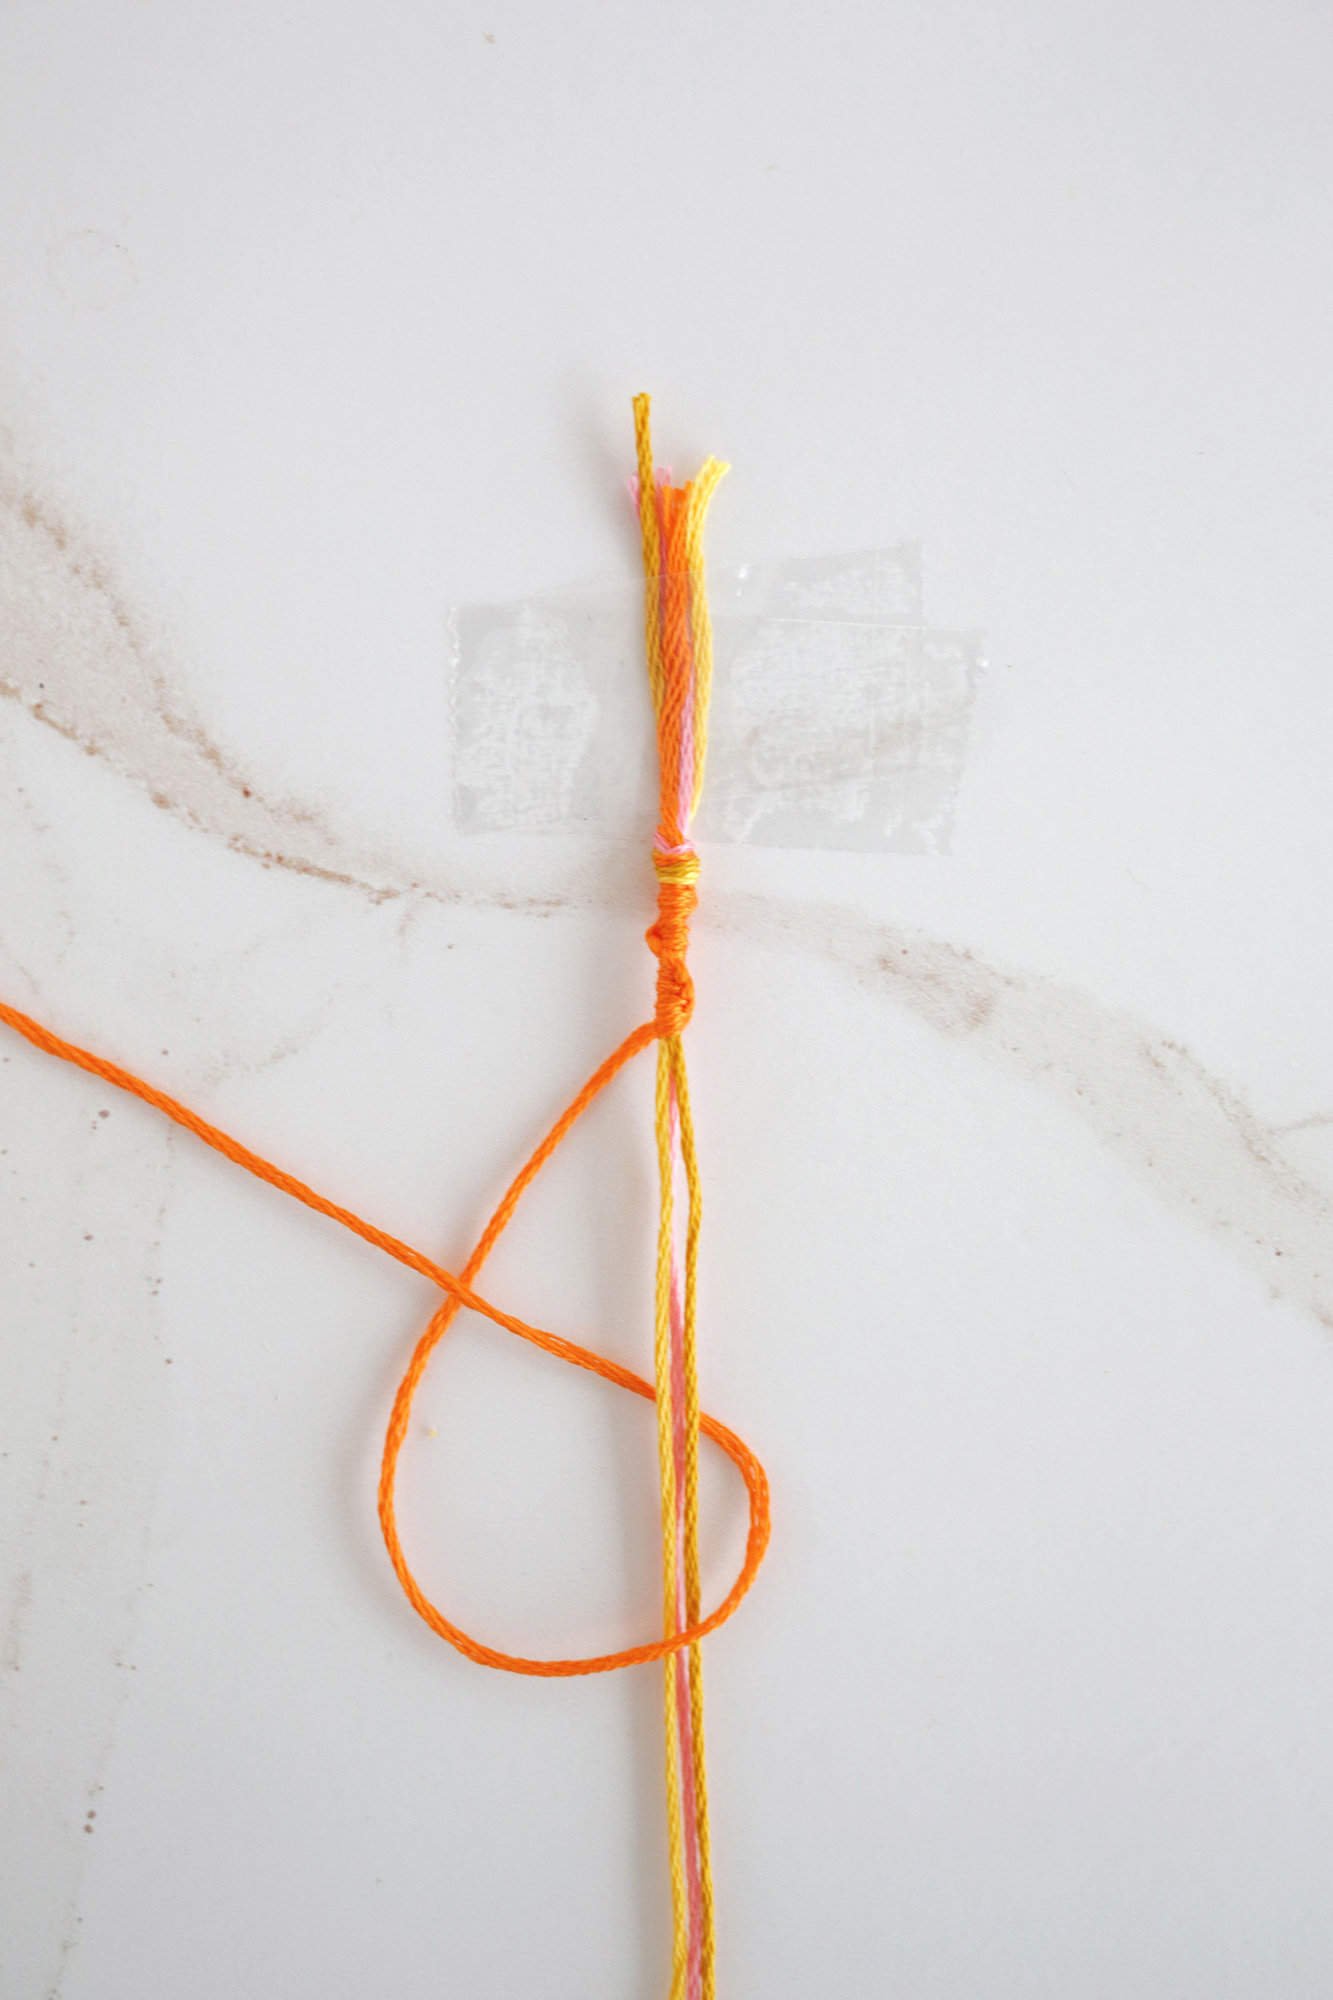
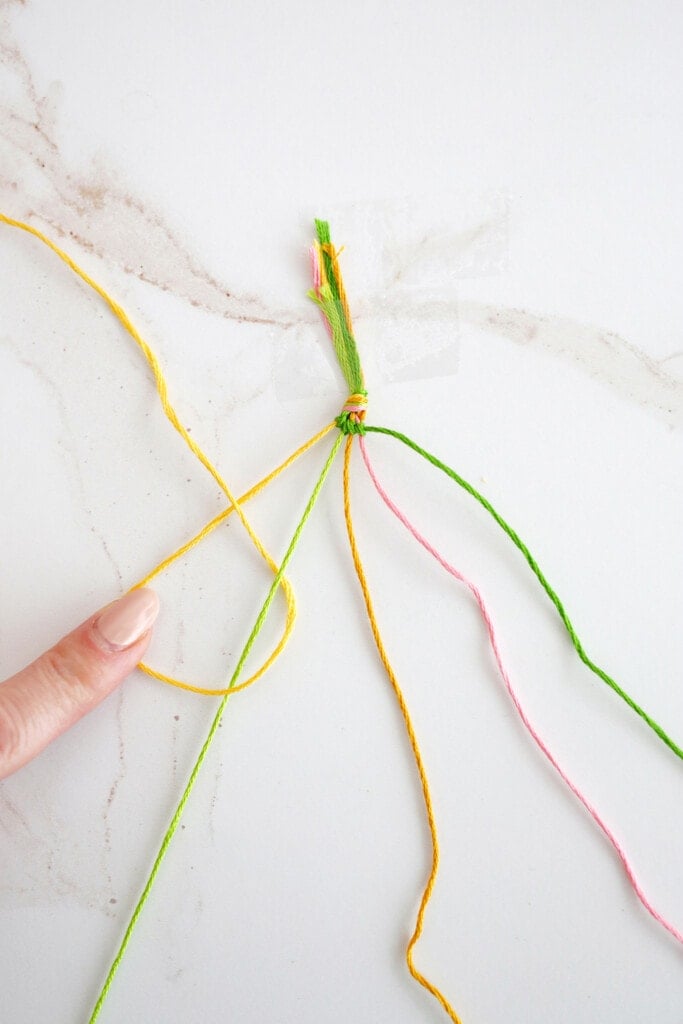
- Lower 4 strands of embroidery thread which might be about 36″ lengthy. Tie them collectively on the prime with a easy knot. You’ll be able to both tape them to a desk or use a clipboard if you’d like to have the ability to transfer round as you’re employed on it.
- Selected one shade (will be any shade) and use that thread to tie a ahead knot across the different 3 threads bundled collectively.
- Repeat and tie a complete of 10 ahead knots with that shade.
- Select one other shade and tie 10 ahead knots across the bundle of the threads with that shade and repeat with every shade creating your staircase.
- When you’ve reached your required size, you may tie your bracelet with a easy knot and your bracelet is full.
The right way to Make a Sweet Stripe Friendship Bracelet
That is a simple bracelet to start out with since you solely have to know learn how to tie ahead knots to make this selection. You should use as much as 6-8 colours (this bracelet is proven with 5), however the bracelet will get wider the extra colours you employ.
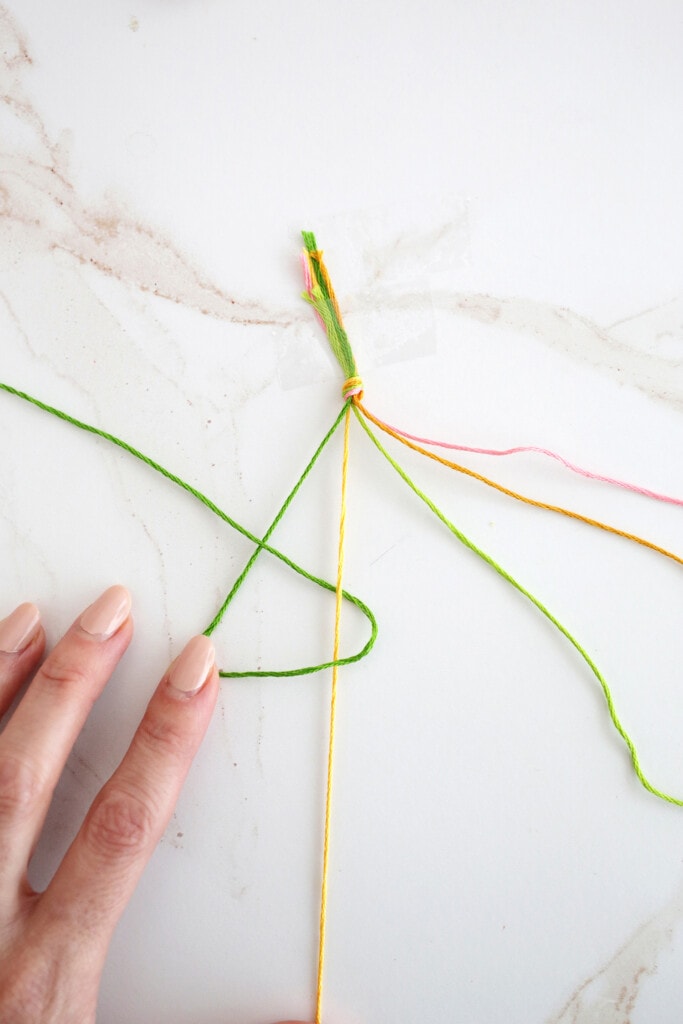

- Lower 5 strands of embroidery thread which might be about 36″ lengthy. Tie them collectively on the prime with a easy knot. You’ll be able to both tape them to a desk or use a clipboard if you’d like to have the ability to transfer round as you’re employed on it.
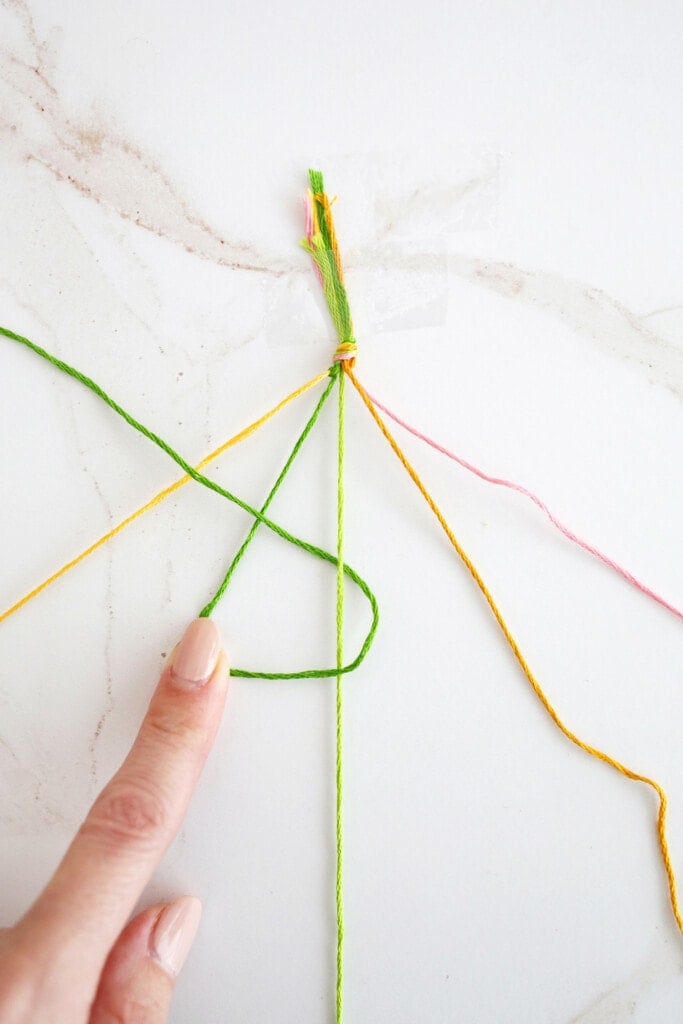
- Take the primary string (A) all the best way on the left and make a ahead knot on the second strand (B).
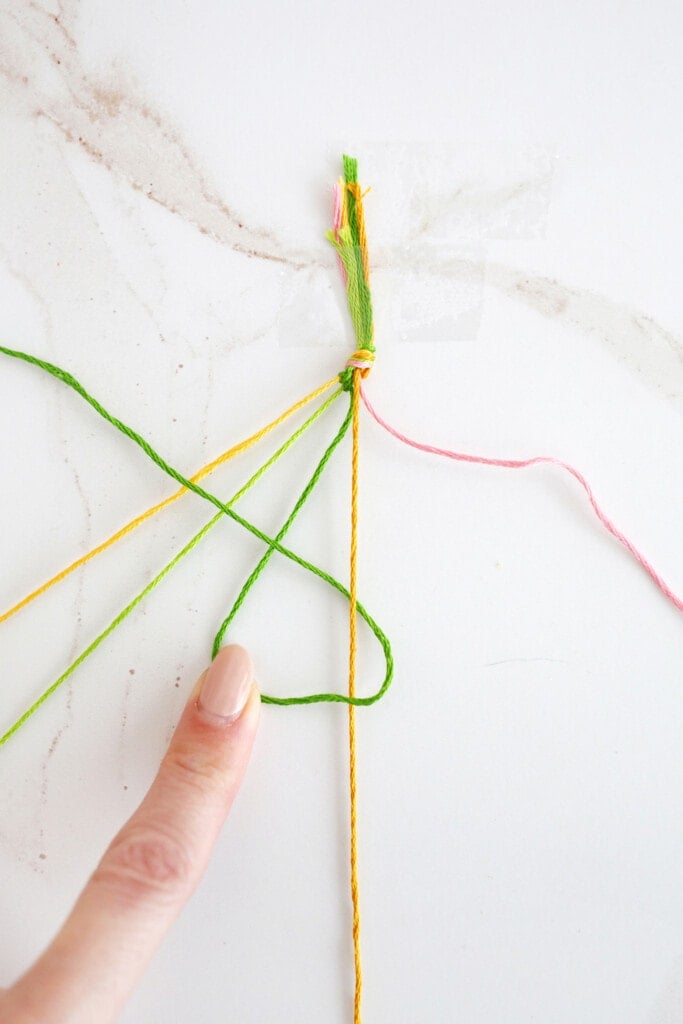
- Repeat by utilizing that first shade string (A) and making a ahead knot on every string (C, D, E), working your manner throughout the strands.
- What was your second strand initially (B) is now your first strand, so that you’ll use that to make ahead knots on every thread all over to the top once more (C, D, E, A).
- Repeat with every strand as they turn into the primary strand in line and also you’ll begin to see your sweet stripe sample seem!
- When you’ve reached your required size, you may tie your bracelet with a easy knot and your bracelet is full.
The right way to Make a Chevron Friendship Bracelet
This bracelet is a bit more fancy, however nonetheless an ideal selection for novices because it solely makes use of forwards and backwards knots. You should use as much as 6-8 colours, however the bracelet will get wider the extra colours you employ.
- Lower 4 colours of embroidery thread about 72″ lengthy. Holding all of your threads collectively, fold in half and make a knot near the fold so you’ve gotten a small loop as the highest of your bracelet.
- Order your thread colours in order that they mirror one another (ABCDdcba).
- Take your first thread on the left facet (A) and tie a ahead knot across the second thread (B).
- Proceed to make use of your first thread (A) to tie ahead knots round your third (C) and fourth (D) thread as properly.
- Now you will repeat the method however backwards on the opposite facet. Take the primary thread in your proper facet (a) and do a backwards knot across the second thread in (b).
- Proceed to make use of your first thread (a) to tie backwards knots round your third (c) and fourth (d) thread as properly.
- Now that each of your first threads are within the center (A and a), take your left-hand thread (A) and do a ahead knot on the right-hand thread (a) to complete off the “V” form.
- Repeat this course of with every outermost string (which is now B and b) and your chevron sample will begin to emerge.
- When you’ve reached your required size, you may tie your bracelet with a easy knot and your bracelet is full.
Friendship Bracelet FAQs
Continuously Requested Questions
How do I get my friendship bracelet to put flat and straight?
In case your bracelet is curving or curling, attempt wetting the bracelet after which tape it so it lays flat and straight on a floor whereas it dries (sweet stripe bracelets are essentially the most vulnerable to curling to at least one facet).
You additionally wish to try to tie your knots evenly on the similar tightness all through the bracelet making course of so it will likely be extra even general.
Why does my bracelet have holes between knots?
In case you are seeing holes between your knots, it signifies that it’s essential to regulate your stress (how laborious you pull) when you find yourself pulling your knots tight. In case you are tying your knots too unfastened, the knots received’t be sitting snugly subsequent to one another and also you’ll find yourself with house between them.
Attempt watching fastidiously as you pull every knot tight and ensure it’s sitting proper subsequent to the knot beside it to keep away from holes.
How lengthy ought to your string be for friendship bracelets?
You’ll wish to have about 36″ of every shade string on your friendship bracelets. When you want two colours of every string (like on the chevron bracelet sample), then you definitely’ll wish to begin with 72″ of string and fold the strings in half, knotted on the prime, so all of your strings are 36″ lengthy.
What do I do if I run out of string?
You’ll be able to add extra string by tying one other strand of the identical shade onto the quick strand. Proceed weaving your bracelet however if you get to the knot, hold the tails of your knot on the bottom of your bracelet after which snip the tails off as soon as the bracelet is completed.
You too can do a dab of tremendous glue on the knot to ensure it stays collectively.
Ideas for Making Friendship Bracelets:
- When tying your knots, you wish to pull the knot firmly tight however not too tight. It ought to really feel like a mild however agency tug to tighten it somewhat than pulling actually laborious.
- Attempt to hold all of your knots tied on the similar tightness to maintain the bracelet wanting even.
- It’s best to work on a desk or a big clipboard so you may tape the bracelet a few foot away from you and have the strings hold down over the desk or clipboard edge.
- Attempt making totally different shade combos for holidays or particular events!
In search of extra bracelet DIYs? Try:
Love this publish? Join our publication for extra concepts!

Get inventive concepts for recipes, crafts, decor, and extra in your inbox!

Get the How-To
Video and picture directions to make 3 straightforward newbie friendship bracelets
Directions
Sweet Stripe Friendship Bracelet
-
Lower 5 strands of embroidery thread which might be about 36″ lengthy. Tie them collectively on the prime with a easy knot. You’ll be able to both tape them to a desk or use a clipboard if you’d like to have the ability to transfer round as you’re employed on it.
-
Take the primary string (A) all the best way on the left and make a ahead knot on the second strand (B).
-
Repeat by utilizing that first shade string (A) and making a ahead knot on every string (C, D, E) working your manner throughout the strands.
-
What was your second strand initially (B) is now your first strand so that you’ll use that to make ahead knots on every thread all over to the top once more (C, D, E, A).
-
Repeat with every strand as they turn into the primary strand in line and also you’ll begin to see your sweet stripe sample seem!
-
When you’ve reached your required size, you may tie your bracelet with a easy knot and your bracelet is full.
Spiral Staircase Friendship Bracelet
-
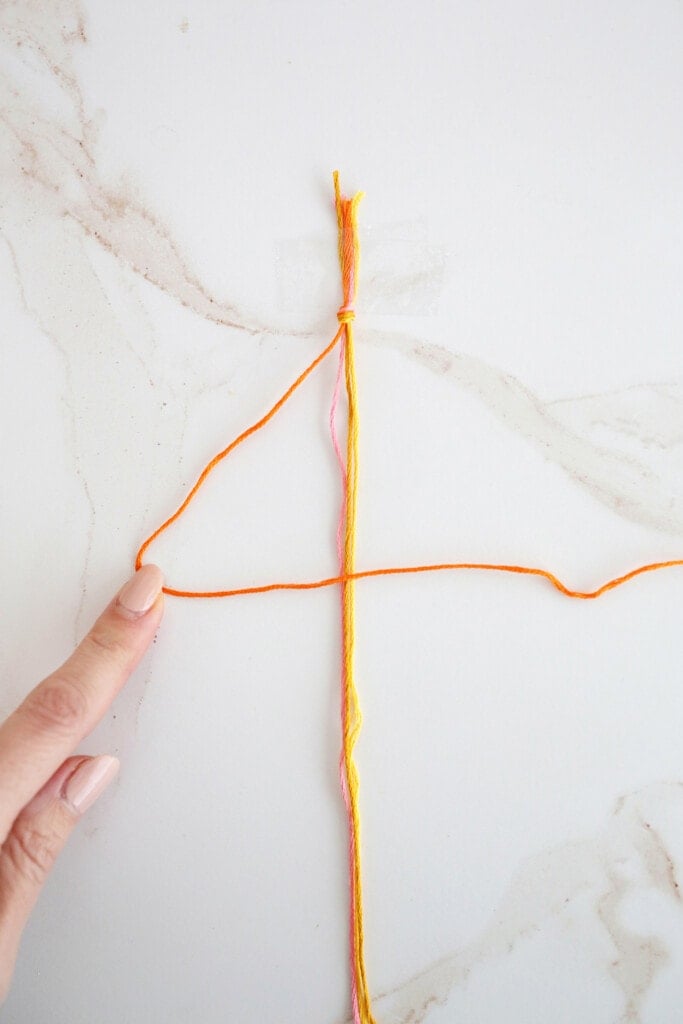
Lower 4 strands of embroidery thread which might be about 36″ lengthy. Tie them collectively on the prime with a easy knot. You’ll be able to both tape them to a desk or use a clipboard if you’d like to have the ability to transfer round as you’re employed on it.
-
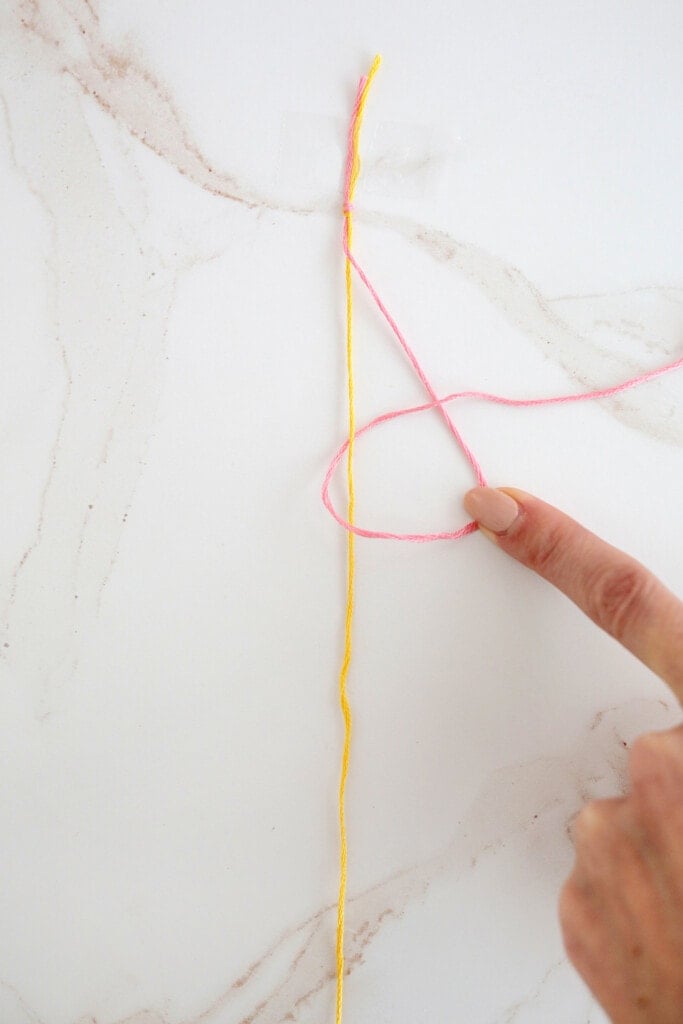
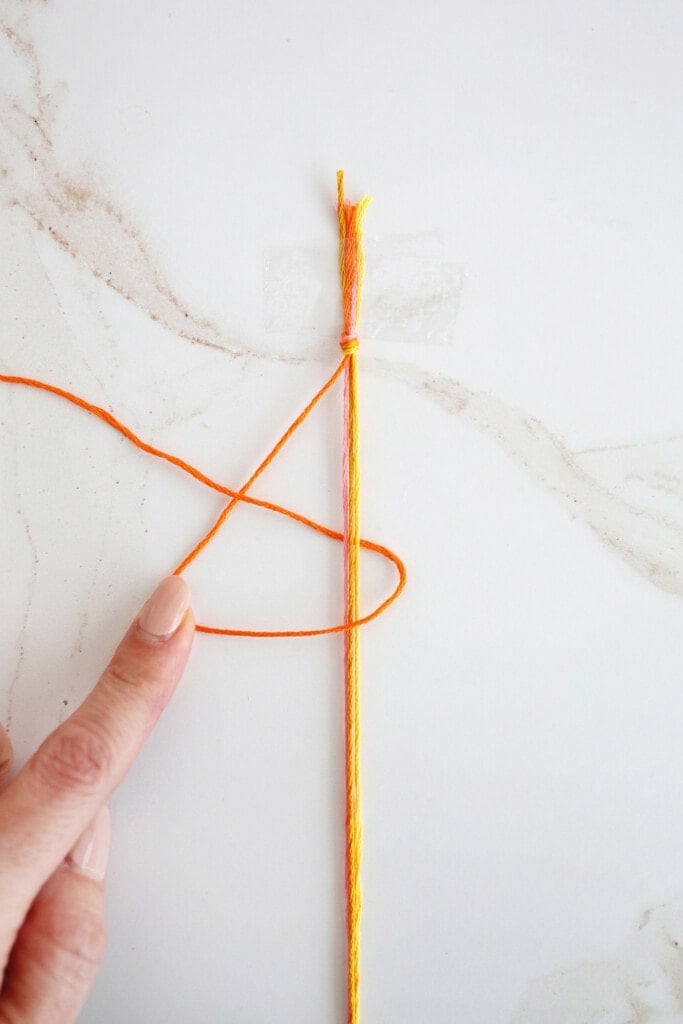
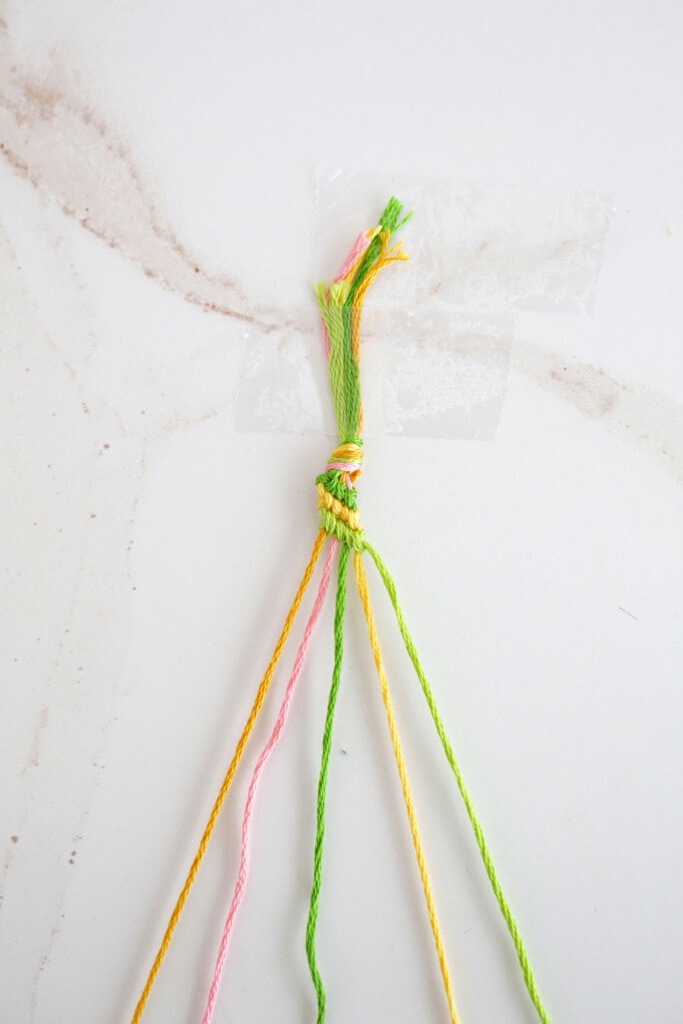
Selected one shade (will be any shade) and use that thread to tie a ahead knot across the different 3 threads bundled collectively.
-
Repeat and tie a complete of 10 ahead knots with that shade.
-
Select one other shade and tie 10 ahead knots across the bundle of the threads with that shade and repeat with every shade creating your staircase.
-
When you’ve reached your required size, you may tie your bracelet with a easy knot and your bracelet is full.
Chevron Friendship Bracelet
-
Lower 4 colours of embroidery thread about 72″ lengthy. Holding all of your threads collectively, fold in half and make a knot near the fold so you’ve gotten a small loop as the highest of your bracelet.
-
Order your thread colours in order that they mirror one another (ABCDdcba).
-
Take your first thread on the left facet (A) and tie a ahead knot across the second thread (B).
-
Proceed to make use of your first thread (A) to tie ahead knots round your third (C) and fourth (D) thread as properly.
-
Now you will repeat the method however backwards on the opposite facet. Take the primary thread in your proper facet (a) and do a backwards knot across the second thread in (b).
-
Proceed to make use of your first thread (a) to tie backwards knots round your third (c) and fourth (d) thread as properly.
-
Now that each of your first threads are within the center (A and a), take your left-hand thread (A) and do a ahead knot on the right-hand thread (a) to complete off the “V” form.
-
Repeat this course of with every outermost string (which is now B and b) and your chevron sample will begin to emerge.
-
When you’ve reached your required size, you may tie your bracelet with a easy knot and your bracelet is full.
Notes
Ideas for Making Friendship Bracelets:
- When tying your knots, you wish to pull the knot firmly tight however not too tight. It ought to really feel like a mild however agency tug to tighten it somewhat than pulling actually laborious.
- Attempt to hold all of your knots tied on the similar tightness to maintain the bracelet wanting even.
- It’s best to work on a desk or a big clipboard so you may tape the bracelet a few foot away from you and have the strings hold down over the desk or clipboard edge.
- Attempt making totally different shade combos for holidays or particular events!
[ad_2]